In this article, We will learn how to draw ears.
Practice Practice Practice
And at the end of the day, you will forget what you learn without practice, so it is highly recommended that you grab all the things listed above and start drawing with me! This is the only way to learn something believe me.
You can use my above drawing image as a reference or you can get a photo reference from the internet.
let’s move on to our first part.
1. DRAWING BASIC STRUCTURE

So first we will draw a rough basic structure of the ear to create a size and shape accordingly.
It is important to create a foundation to build upon so that you don’t have to keep looking at the proportions.
So when you are ready with it, let’s move to the next part.
2. OUTLINE OR CONTOUR DRAWING
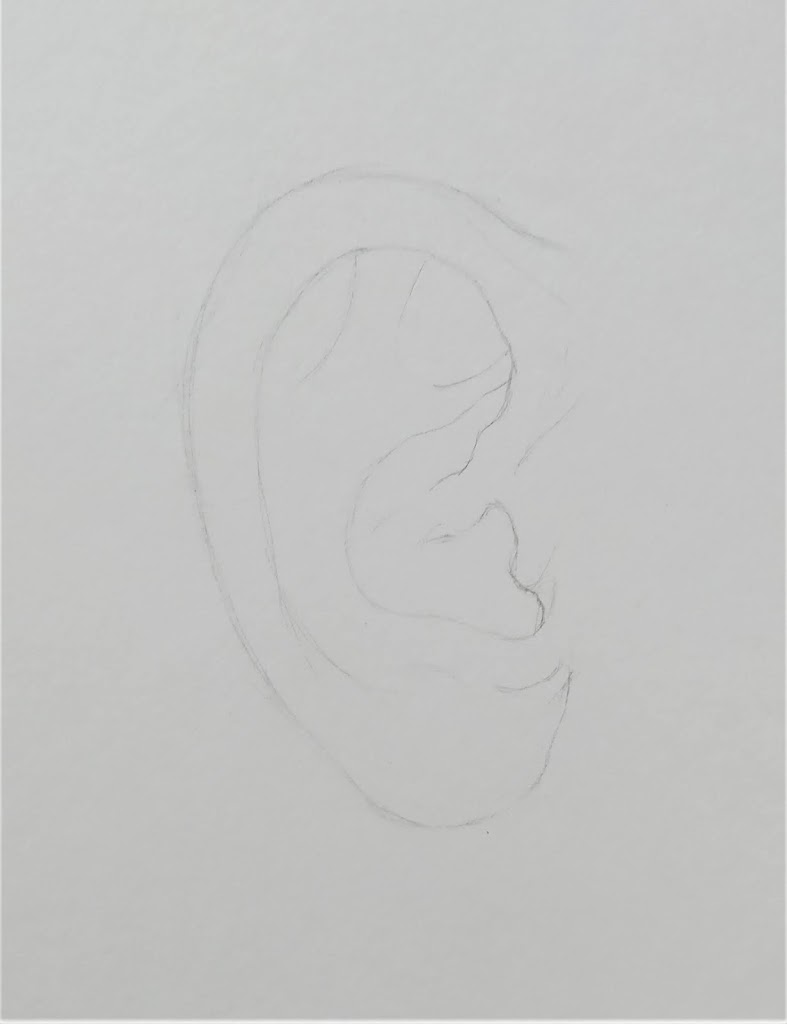
Now, this is the most important part of the entire drawing, I say this in all the tutorials.
Spend time on this, Because without a proper outline of the subject no matter how good your shading is the drawing will still look bad.
So now draw the outline of the ear upon the basic structure we have drawn, Try to draw it with the HB pencil and as light as possible. So you can darken it later if required.
If you want to learn more about the outline check out the Eyes tutorial
Now let’s move to the third part…
3. ADDING LAYERS

The drawing subject’s tonal value should look different from the tone value of the paper so that it doesn’t get mixed up with the paper.
now we can move towards the 4th step.
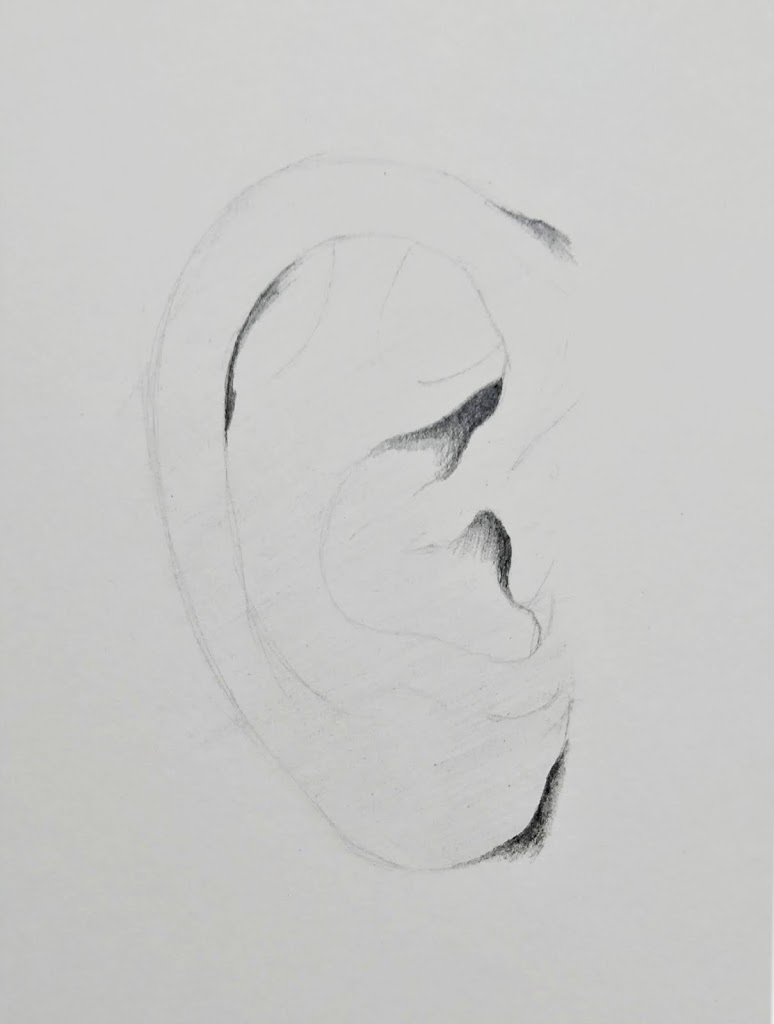
4. SHADING
Let’s begin with the fun part.
We will start the shading process with the darkest tone so we can compare the tones accordingly and don’t come near to these dark tones on the later shading.
You can use the 4B or 6B pencil to shade the dark part or you can even use a charcoal pencil for it, The best thing about using a charcoal pencil is they are darker than the graphite pencil and doesn’t shine in reflection to light which is the annoying part of graphite pencils.
Here the darkest part is the cast shadow and the ear holes.
to the next step…
5. USING PAPER STUMPS

Now compare the 4th and the 5th part.
We have to use the paper stumps to smooth out the hard shade from dark to light, It is also known as Blending.
Pay attention to how the shade looks fading from dark tone to middle tone to light tone, this will give it a realistic look.
If you have not used paper stumps before, you have to make tiny circles with the paper stumps on the graphite and gradually slide it away, you have to repeat the process to get the desired effect.
If you don’t want to make mistake on your drawing then try practicing on a rough paper first.
Repeat the process of shading to other areas.
6. SHADING LAYERS

We have to repeat the process of shading in the remaining parts,
just distinguish the light,
middle and dark tones and shade it accordingly or as per the reference image, you know you don’t have to be perfect because we will be using paper stumps to smooth our shading.
While shading you have to remember that the actual ear or shape is in 3D, so it has bumps and bends and dents so you have to shade in that particular direction as the bump is turning or forming the shape
look at the below image,
how the pencil strokes are turning as per the shape of the object or the ear.

So as we have done the shading now we can move to the next step of blending the shading with the paper stumps.
7. BLENDING THE SHADING

Here we have blended all the pencil strokes in a smooth-looking drawing.
You can notice there are not many pencil outline lines visible as suggested on the second step to go with a lighter pencil and with a lighter pressure for outlining.
The reason behind it is, in real objects or things we don’t see outlines. So if we keep that very light it adds to look more realistic and more natural.
We are not done yet, because the ear looks too clean unlike in real scenarios.
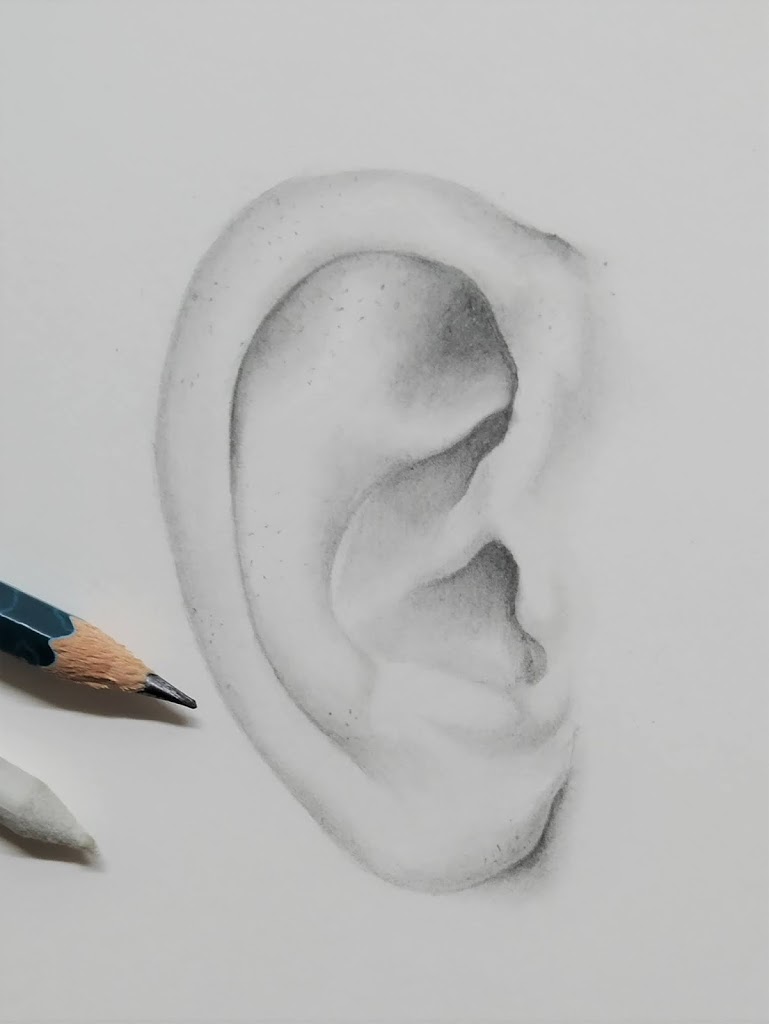
8. ADDING TEXTURE

This is the time we add a little texture and some spots as we encounter in real skin, This will make our drawing look even more natural and believable.
To create texture in this particular ear I have used a group or bunch of black spots in some locations to give it a feel of skin pores like we see in real skin.
You can scroll and look at the steps as many times as you want till you understand what I am trying to say and can implement it on your drawing.
Please Note:
Experiments are a must for learning how to draw, it will give a sense of knowledge about what is working and what is not.
And eventually, you will develop a personal style to draw like all the artists have their own styles to draw and shade.
I hope you learned something valuable from this article and have learned something about how to draw.